What Is Chromatic Aberration, to Begin with?
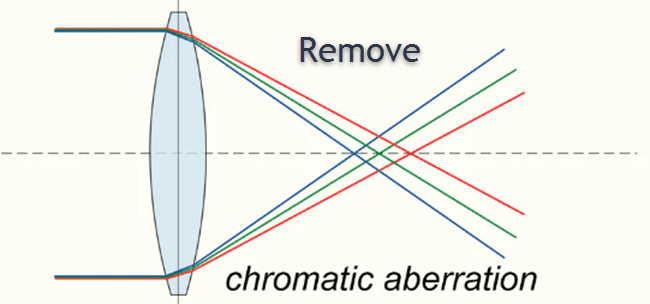
Chromatic aberration describes the situation when light rays pass through the focus of the lens at multiple points because of differences in their wavelength.
Sometimes referred to as color fringing, spherochromatism, or chromatic distortion, it can be described more simply as the failure of the lens to focus all the present colors on a single point. It is manifested by varying “fringes” of color on the boundaries that separate the bright and dark parts of the picture.
There are 2 types of this problem:
- Axial or longitudinal chromatic aberration / axial color aberration
- Lateral chromatic aberration
Click to Quickly Navigate to:
- What Lens Aberration is
- Ways to Fix and Avoid Purple Fringing
- Best Apps to Remove Chromatic Aberration
To capture a flawless image, all wavelengths of light rays entering the lens need to be equal. If these wavelengths vary in their lengths, axial chromatic aberration is said to have occurred. This type of chromatic aberration is manifested by blurred colors both on the front and behind the position of focus due to the differences in each color’s focal point. It only manifests itself on the edges.

Another thing – multiple colors need to be magnified in the same way. If a variation occurs in the magnification of the colors that make up the image, they become more visible at the periphery of the image – we call this lateral chromatic aberration.
What Is Lens Aberration Correction?
As aforementioned, chromatic aberration in lenses is a result of lenses refracting multiple wavelengths of light differently, preventing different colors from converging to one point on the sensor.
So what’s lens aberration correction? Well, it is an effort to reverse the effect of chromatic aberration but with the lens. Remember there are several techniques for correcting this problem, including the software approach (more on this later).
In lens aberration correction, the lenses are made to refract different wavelengths of light in the same way. This ensures that all colors converge to the same point on the image sensor.
Is Your Lens Corrected for Chromatic Aberrations?
It depends. If it’s lateral chromatic aberration, in one word – “No.” Lateral chromatic aberration only manifests itself at the frame’s edges instead of the center. As such, it can’t be corrected just by stopping down the lens. Instead, you will rely on in-camera functions or post-production to get rid of this kind of aberration
How to Fix Chromatic Aberration
Let’s start by admitting one not-so-obvious fact – chromatic aberration correction is extremely difficult to achieve via the lens route although there have been several efforts to resolve it with a more thoughtful lens optical design. The hardest type to prevent is an axial aberration because it deteriorates the sharpness of the image.
Still, the best shot is to adjust the lenses in such a way that the geometric positions present in the scene are aligned with their respective colors.
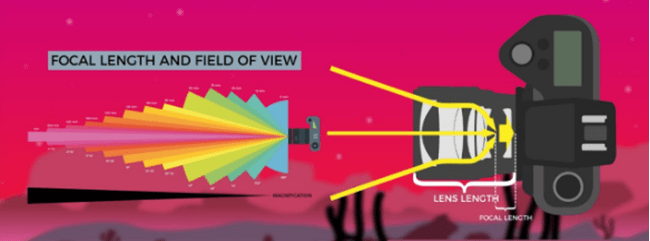
This is normally achieved by increasing the focal length of the lens. Whether you choose to use the functions that came with your camera or specific types of lenses (such as those with low-dispersion glasses), the output will be near flawless.

It’s worth mentioning that in-camera lens aberration correction sometimes works on specific formats, such as JPEG images, depending on the maker of your equipment. Also, it can take quite some time to do it and this may delay certain things that should be fast and trouble-free, like writing the image on the card.
For those reasons, you’d only use it in situations requiring JPEG output (or whichever format is supported by your equipment) with zero post-processing.
So, if you like to capture your images in the RAW format and you know it isn’t supported, it would only make sense to turn off the feature.
Since chromatic aberrations vary quite widely depending on the distance and focal length – and can be difficult to correct with your optics at times – software like the DxO algorithm can be a better alternative because they are designed to consider those two key parameters to correct chromatic aberrations in JPEG and RAW images.
Most cameras sold nowadays come with a chromatic aberration filter and functions that allow you to keep axial aberration to a minimum without the need to use a narrow aperture.
In-camera functions can also prevent color fringing arising from lateral aberration without the need to alter your focal length. If you use these functions properly, you have very little to worry about as far as the quality of the image is concerned.
Another obvious “trick” to preventing chromatic aberration is to know the scenarios in which it’s likely to occur and enable correction functions at the right time.
Watch out for these situations:
- With telephoto lenses, when there's a need to shoot at the highest aperture to get the right depth-of-field
- When shooting at untraditionally wide angles – you want to use a wider angle of view to exaggerate perspectives
- When shooting at certain telephoto angles – you don’t want to change the aperture setting because it will influence the appearance of the image.
Here are more ways to fix or reduce chromatic aberration:
1. Go slow on high-contrast scenes – don’t use them. A photographer can avoid situations that end up with color fringing. You are probably aware that most scenes don’t even trigger chromatic aberration. But you should always go with low-contrast.

If you are shooting a dark or black subject with a white background, find a way of changing the background. Ensure the background has similar colors to the subject. For example, rather than shoot a person with a blue dress against a brightly lit white background, consider shooting them against, say, a green or brown background. That way, chromatic aberration will be less of a nuisance.
2. If you choose to use zoom lenses, don’t pick the longest or shortest focal length
3. If the situation allows, switch from a color image to a simple black-and-white
4. Use lenses with low-dispersion glasses, preferably those that come with fluorite. They are known to cut chromatic aberration considerably
5. Avoid closing down the aperture as it reduces the light reaching the sensor, forcing you to compensate by adjusting your ISO and reducing the speed to achieve the right exposure.
Sometimes referred to as “stopping down,” you can use an aperture about one stop or two above the lens’s maximum. In situations that require you to work with, say, an f/2.8 lens, you can stop down to f/4, even f/5.6 and everything will just turn out right.
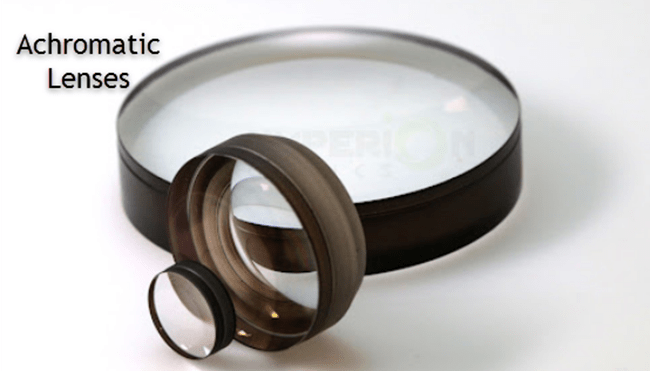
6. Use an achromat (achromatic lens), which is designed to correct this problem by bringing two wavelengths (often blue and red) into focus on one plane. The most often used achromatic doublet comes with 2 individual glass lenses that permit different degrees of dispersion.
Oftentimes, part of the doublet’s arsenal is a single ultra-low dispersion lens. If you would like to achieve even better results, go for apochromatic lenses, which are designed to correct 3 different wavelengths of light.
7. One of the best ways to correct lateral chromatic aberration – especially for starters – is post-processing software.
The market has tons of them on offer, but the best ones to get started with are Photoshop and Adobe Lightroom. The latter comes with both manual and automatic correction tools for longitudinal chromatic aberration, including a handy “defringe tool” within the unmistakable “Lens Corrections” module.
With these, you don’t need to be a highly skilled photographer to keep your images flawless.
You can either reduce or entirely remove any level of fringing at the click of a mouse. The software can prove useful to even the most skilled photographers because – remember – stopping down the lens does very little to reduce chromatic aberration.
Also, because of certain odd angles at which rays may enter the lens, the standard achromatic doublet may not get rid of it either.

8. Only use cameras equipped with in-camera solutions aimed at alleviating different kinds of chromatic aberration. Some cameras, like the Lumix series sold by Panasonic and newer Sony and Nikon DSLRs, come with special processing functions for the elimination of purple fringing.
9. Ensure the subject is standing at the center of the frame before you capture the image. Lateral chromatic aberration mainly occurs near the frame’s edges.
So, by positioning your subject in the middle of the frame, you get to reduce the chances of chromatic aberration affecting the output. However, there will be situations where chromatic aberration will get out of hand even with such measures.
That's where the concept of post-processing comes into the mix (more on this later).
How to Avoid Purple Fringing?
Purple fringing (simply denoted as PF) is used to describe an unfocused magenta or purple “ghost” image on a piece of photography.
It is a type of optical aberration characterized by two attributes: coloring on the main image and lightening of black or dark edges close to bright segments of broad-spectrum illumination. It can be more profound if you use gas-discharge lamps or bright daylight.
While it’s easy to remove purple fringes during post-processing with software, you can save yourself a lot of time and effort by avoiding it at the source.
Here are the 3 most often recommended methods:
1. Avoid shooting with a wide-open lens, especially in high-contrast scenes.
2. Shoot your subjects with a strong UV-cut filter
3. Avoid overexposing highlights (such as specular reflections, bright skies behind dark objects, etc.)
Most of the commercial photo processing applications sold today are equipped with “Purple Fringing” algorithms that do a great job of removing the purple fringing from even the worst captured images.
However, as mentioned above, you’d rather prevent it in the lenses than wait for it to manifest on the image and try to eliminate it with software.
The software isn’t perfect either. Since the algorithm must deal with complex contrast and colors in the image, it may not eliminate all the fringing flaws because it can be hard sometimes to distinguish between real colors and fringing colors in one scene.
Post-Processing Software: Best Software to Remove Chromatic Aberration
We mentioned something about post-processing and software that can be used to correct the product of your fringing camera.
Let’s take a glance at some of those apps:
1. DxO

The award-winning DxO Photolab lives up to the praise by providing DxO OpticsPro workflow which is based, essentially, on auto support for the camera’s RAW format.
Related – DxO PhotoLab versus Lightroom
It is equipped with a DxO Optics Module which makes automatic corrections on the flaws of the lens. If your equipment has no Optics Module, the software comes with an easy-to-learn DxO OpticsPro’s manual toolbox, notably to correct chromatic aberration, vignetting, and distortion.
It is a darling of photography professionals. It “controls every color” and creates colors just as perfectly, thanks to the tons of precision editing tools.
2. Luminar Neo

The makers claim it’s the first AI (artificial intelligence) powered image editor on the planet. Whether that’s stretch or true, Luminar Neo is one of the most sought-after image editors out there and comes with all tools you need to remove blemishes from your images, including flaws resulting from chromatic aberration.
3. Corel PaintShop Pro

This is the only application that came closest to seriously rivaling Photoshop. The best thing is that, unlike Photoshop, you don’t need to pay a monthly fee to use Corel PaintShop. With this app, you can complete a single editing job in one sweep; something that may take two or more Adobe products to accomplish.
However, Photoshop comes with a rich collection of tools not available on Corel PaintShop.
Nonetheless, it is one of the best post-production applications out there for correcting chromatic aberration.
At this point, you could ask: “is it possible to find chromatic aberration effect online?” Absolutely. Some sites allow you to upload your fringing photography, get them corrected, and download them to use them elsewhere. We don’t recommend it though.
In Conclusion, Beware of Fake Chromatic Aberration
Not everything that looks ‘chromatic aberration' is it. On pictures captured with digital cameras, very tiny highlights may occasionally appear to have a touch of chromatic aberration.
However, this is perfectly normal when the highlight image is significantly smaller and can’t simulate all the 3 color pixels.
So, it ends up with a false color. Fortunately, this only occurs in certain kinds of digital camera sensors. Again, the de-mosaicking algorithm may have an unwanted influence on the apparent extent of the problem.


