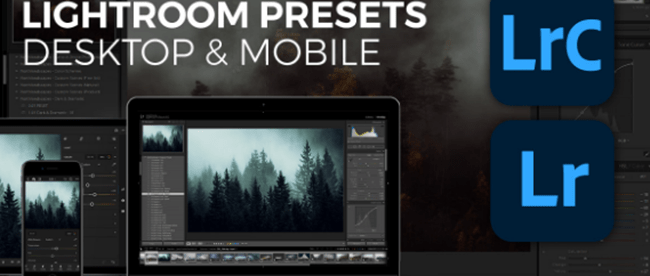
If you're looking for ways to improve your photography, installing lightroom presets is a great way to do so. Presets can add amazing effects and make your photos look professional with just a few clicks.
We'll show you how to install lightroom presets and add the best presets to your collection. We'll also give you some tips on importing presets into Lightroom for the first time.
What Are Presets Used for?
Preset is an assortment of photo editing options aimed at transforming digital images into stunning finished products in one simple click. It has a broad spectrum including phone apps and software and is often known under many other names, like style, Photoshop plugin and photofilter.
How to Install Lightroom Presets?
The following simple instructions show you how you can add Lightroom presets to Adobe Photoshop in two to three minutes. If you have never installed Lightroom presets before, this guide will show you how to do it quickly and easily.
1. Download the presets you want to install from the internet or from a friend.
2. Unzip the presets folder by double-clicking on it. You should now see a folder with the name of the preset collection and a bunch of .lrtemplate files inside it.
3. Open Lightroom and go to the Develop module.
4. Right-click on any of the presets in the Presets panel and select Import from the menu that appears.
5. In the Import Presets dialog box that appears, navigate to the folder where you unzipped the preset collection and select it.
6. Click the Import button and the presets will be installed.
That's all there is to it! You can now start using the presets in your workflow.
Learn How to Install Lightroom Presets in Lightroom for Windows Users (lrtemplate Files Format)

- Find a directory where your preset files were downloaded (Windows 8 and older are usually in C: User downloads).
- Extract the downloaded LRtemplate file or select the extracted LRtemplate file. Select the folder with the presets. They are to be named with a prefix after ‘presets'. CTRL + C to copy.
- Click on a Lightroom file to open the Preferences menu.The above steps may differ depending on the Lightroom software you use.
Install Lightroom Presets Folder for MAC OSX USERS (lrtemplate Format)
- Choose your Mac folder in which your browser has downloaded Lightroom's preset.
- Extract the downloaded file. Go to macOSX folder, then copy it from that folder.
- Unzip Lightroom Classic and navigate to the Editing Settings menu on the Mac.
- Click on Presets tab and choose the folder ‘Lightroom presets'.
- Select using the double-click on Lightroom.
- Afterwards, click on the Develop Preset folder on the Mac.
Install Lightroom Presets folder (XMP file format/ version) for Windows Users – Lightroom CC or Lightroom Classic CC
1. Download the Lightroom Presets file in XMP format/ version.
2. Unzip the downloaded file.
3. Open Adobe Lightroom CC or Lightroom Classic CC on your computer.
4. Go to: Edit > Preferences > Presets tab (Mac users) or File > Preferences > Presets (Windows users).
5. Click on the “Show Lightroom Presets Folder” button. A new window will be opened, displaying the Lightroom Presets folder.
6. Copy the extracted XMP presets files into the Lightroom Presets folder.
7. Restart Adobe Lightroom CC or Lightroom Classic CC.
You will now see the new presets in the Presets panel, under the User Presets heading.
How Do I Add Presets to Lightroom?
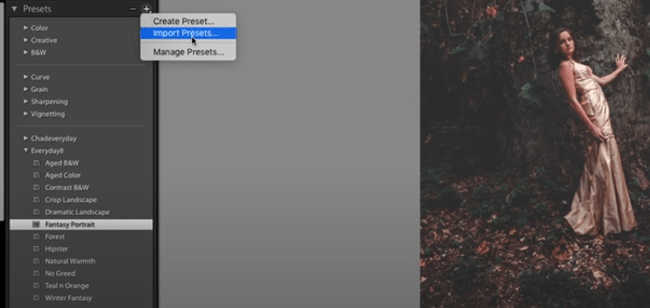
You can begin experimenting by selecting a photograph from a library. Navigate through the browser toolbar and click the preset menu.
Click on the three dots icon to download the preset. It's a good idea to navigate to a folder where it was downloaded and imported.
To access the presets, open the Presets panel.
In the Presets panel, click on the + icon and select “Import Presets”.
Navigate to the folder where you downloaded the preset and import it.
How Do I Add Presets to Lightroom CC?
Open Lightroom CC and click File -> Import Profile & Settings. Choose the XMP file you've unzipped, then click Export. You've got the preset installed in Lightroom. Select your photos to edit and click Edit at the bottom of the screen.
How to Install Lightroom Classic v7.3 and up (XMP Files)
Now that you have your Lightroom Classic catalog installed, it's time to add your XMP files. Adobe provides an easy step-by-step guide on their website.
1. Go to the File > Import Profiles and Presets menu item.
2. Select the “From a File” option and browse to your XMP file.
3. Choose the “Import” button and your XMP will be installed.
Your XMP files are now installed and you can begin editing your photos in Lightroom Classic!
Installation of Presets in Lightroom 4 to 6 and Lightroom Classic (Version 7.2 or Older)
1. Download the preset files to your computer. The presets will be in .lrtemplate or .xmp format.
2. In Lightroom, go to: Edit > Preferences (Windows) or Lightroom > Preferences (Mac).
3. Select ‘Presets' from the preferences dialog box.
4. Click on the “Show Lightroom Presets Folder” button. A new Finder (Mac) or Explorer (Windows) window with the Lightroom presets folder will be opened.
5. If you are installing .lrtemplate presets:
* Copy the preset files into the folder – Develop Presets.
* Restart Lightroom.
6. If you are installing .xmp presets:
* Copy the preset files into the Settings folder.
* Restart Lightroom.
7. That's it! You will now find the Presets in the Develop module.
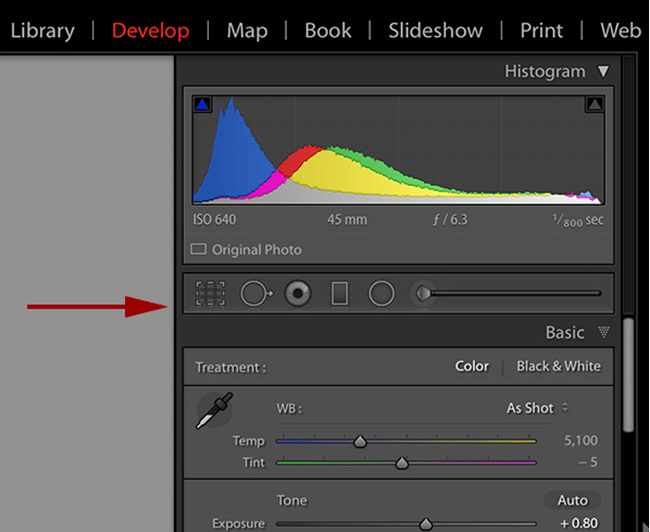
How Do I Use Lightroom Presets?
You need a lightroom image. Then select the image that you want.
Click the Botton icon in the Toolbar to select a preset tab. Then click the 3 dots icon.
Choose Import presets/setups.
Alternatively, you can download the ZIP file and import the ZIP file.
What Is The Difference Between Lightroom and Presets?
If you're a photographer, chances are you've heard of Lightroom and presets. But what exactly is the difference between these two things?
Lightroom is a powerful photo editing software that gives you complete control over your images. Presets, on the other hand, are simply predefined settings that can be applied to your images with just a few clicks.
So, which one should you use? Well, it really depends on your needs and preferences. If you're looking for complete control over your images, then Lightroom is the way to go. However, if you're just looking for a quick and easy way to edit your photos, then presets are definitely the way to go.
Are Lightroom Presets Worth It?
Buying $25 packs may seem good, but anything less is generally unremarkable. You should also always choose your own custom style, no matter what preset you are buying. If you like the results, it is probably worth it. If not, keep looking for something better!
How Do You Add Presets to Photos?
When it comes to editing photos, presets can be a great time-saver. Presets are essentially pre-made filters that you can apply to your photos with just a few clicks. And the best part is, there are tons of free presets available online. We'll show you how to add presets to photos in both Lightroom and Photoshop.
Adding Presets in Lightroom
To add presets to photos in Lightroom, simply select the photo you want to edit, then click on the “Presets” button in the left panel.
Next, click on the “Import Presets” button at the bottom of the window. This will open a new window where you can select the preset files you want to import.
Once you've selected the presets you want to use, click on the “Import” button and they will be added to your Lightroom library.
To apply a preset to a photo, simply select the photo and click on the preset you want to use. The changes will be applied instantly.
Adding Presets in Photoshop
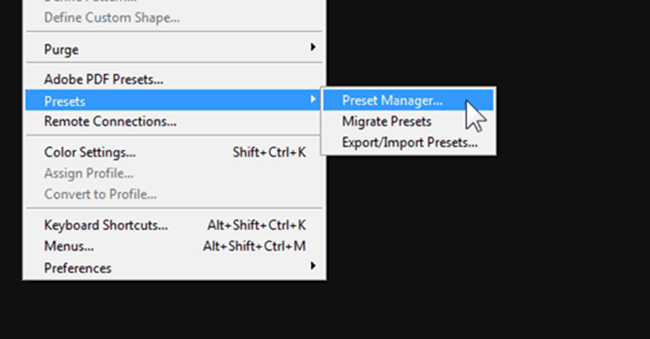
To add presets to photos in Photoshop, you first need to open the photo you want to edit in Photoshop.
Next, click on the “Window” menu at the top of the screen and select “Actions.” This will open the Actions panel. In the Actions panel, click on the “Create new action” button.
In the “New Action” dialog box, give your action a name and click on the “Record” button. Now, simply perform the steps you want to record. For example, if you want to add a preset to a photo, you would select the photo and then click on the preset you want to use.
Once you've performed the steps you want to record, click on the “Stop” button in the Actions panel.
Now, to apply the action to other photos, simply select the photo you want to edit and click on the “Play” button in the Actions panel. The action will be applied to the photo instantly.
How Do You Import Lightroom Presets to My Phone?
For importing presets on mobile phones, it is necessary to import these to lightroom desktop applications. The files can be imported to the cloud or synchronized to the lightroom apps.
In Lightroom Desktop, click File > Import Profiles & Settings. Click the “Choose” button and navigate to the location of your presets. Lightroom will automatically import the files.
For Lightroom Classic, open the Develop module and click on ‘Presets'. Click on the three dots menu icon and select Import Develop Settings. Choose your preset file and click Import. The presets will be imported to the User Presets folder.
To import presets to the Lightroom mobile app, open the app and go to ‘Presets'. Tap on the + icon and select Import from File. Choose the preset file and tap Import. The presets will be imported to the My Presets folder.
Installation of Presets in Lightroom Mobile
Lightroom presets can be installed in two ways.
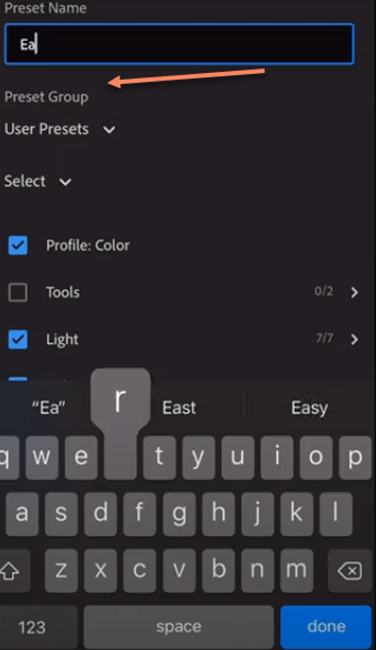
Method 1 should be a very good choice for getting your Preset to run. Unless you are using Adobe's Creative Cloud, then you should use Method 2 which will be longer but will work for sure.
Method 1: E-Mail the Preset to your Device
This is probably the easiest way to install a Lightroom preset on your device. All you need is an e-mail account and of course the preset file itself. The great thing about this method is that it doesn't require any special software or anything like that. All you need is the preset file and your e-mail account.
1) First, open up the email account that you want to use to send the preset file to your device.
2) Next, create a new message and attach the preset file to it. Make sure that the preset file is in a ZIP format.
3) Now, address the email message to yourself and send it.
4) Once the email arrives on your device, open it up and tap on the attached ZIP file. Lightroom will automatically launch and import the preset into your device.
Method 2: Use Adobe Creative Cloud
If you are using Adobe Creative Cloud, then you can easily install presets into Lightroom Mobile using this method.
1) First, open up Adobe Creative Cloud on your computer and log in with your Adobe ID.
2) Next, go to the Presets section and click on the + sign.
3) A window will pop up asking you to select the preset file. Select the preset file that you want to install and click on the Open button.
4) The preset will now be uploaded to your Adobe Creative Cloud account.
5) Now, open up Lightroom Mobile on your device and log in with your Adobe ID.
6) Go to the Presets section and you will see the preset that you just installed. Tap on it and it will be applied to your photos.
How Do I Use DNG Presets in Lightroom Mobile?
Download DNG on a smartphone.
Send DNG image to Lightroom Mobile.
Click on a photo to open a preset, select the three highest spots and choose the setting. You'll now be using the lighting module!
Use this preset to create the new image.
How Do I Use Lightroom Presets on My Iphone?
There are a couple of ways that you can use Lightroom presets on your iPhone. The first way is to download the Lightroom app and then sign in with your Adobe ID. Once you have done this, you will be able to access all of your Lightroom presets that you have saved to your Creative Cloud account.
The second way to use Lightroom presets on your iPhone is to download a third-party app that allows you to import and use Lightroom presets. There are a few different apps that you can choose from, but we recommend using the LR/Transporter app. This app makes it easy to transfer your Lightroom presets from your computer to your iPhone, and it also allows you to use the presets within the app.
Once you have your Lightroom presets on your iPhone, you can use them in a couple of different ways. One way is to apply the preset to a photo that you have already taken.
Are There Free Presets for Lightroom?
Yes, there are a number of places where you can find free Lightroom presets. There are a number of websites that offer free presets for download.
Additionally, many photographers and retouchers offer free presets as part of their portfolio or as an introductory sample of their work.
Finally, there are a number of bloggers and YouTubers who create and share free Lightroom presets as part of their content.
Related: Best Cameras for Bloggers
Is FLTR Pro Free?
The FLTR feature gives photographers the option of selecting the preset that best fits each of your photographs – helping you create great images at no extra charge!
Which Lightroom Preset Is Best?
Best Lightroom presets download:

Software Presets from Creative Market
Skylum Presets section
How Do I Create a Preset in Lightroom?
There are a few things you need to do to create a preset in Lightroom.
First, you need to select the photo or photos that you want to use for your preset.
Next, you need to go to the Develop module and make any adjustments that you want to be included in your preset.
Once you have made your adjustments, you need to click on the + sign next to Presets in the left panel and select Create Preset.
In the Create Preset dialog box, you need to give your preset a name and then select which settings you want to include in the preset.
Once you have made your selections, you can click on the Create button and your preset will be saved.
How Do I Sell My Presets?
Photographers can have an Internet website for the sale of their presets. Sellfy or Creative Market are software applications and platforms where you can sell Lightroom presets.
Why Can't I Import Presets into Lightroom?
There are a few potential reasons why you might not be able to import presets into Lightroom:
1. The preset file is corrupt.
2. The preset file is not compatible with your version of Lightroom.
3. The preset file is not in the correct format.
4. You do not have permission to access the preset file.
If you are having trouble importing presets into Lightroom, please contact customer support for further assistance.
Conclusion
Presets can help you save time by streamlining your editing process. They are also a great way to share your unique style with the world. If you’re looking for some new Lightroom presets, or want to learn how to create and sell your own, we’ve got you covered.
We walked you through the basics of installing and using presets in Lightroom.
Start experimenting with presets today and see what amazing things you can create!
