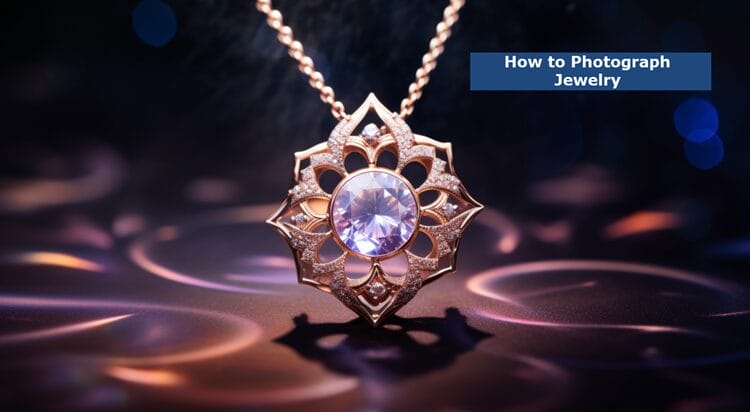
We are glad to have you here with us on how to photograph jewelry; exploring the art, craft, technique, and passion that goes into capturing amazing images of jewelry.
Now, close your eyes and picture yourself as a seasoned, experienced jewelry photographer capturing the light and minute details of each piece.
In this article, we will give you some jewelry photography ideas and guide you through the art of photographing jewelry with precision and finesse.
From understanding the importance of lighting and setup to mastering post-production techniques, we’ll equip you with the tools and knowledge to showcase jewelry in its full glory.
Prepare yourself to enhance your photography abilities and produce amazing imagery that genuinely captures the true nature of every fabulous piece.
Key Takeaways
- Experiment with different lighting techniques to capture the brilliance and sparkle of jewelry.
- Choose a background that complements and enhances the beauty of the jewelry.
- Use post-production techniques to enhance the overall quality and attractiveness of the images.
- Utilize the macro setting on your smartphone camera for close-up shots of jewelry.
How to Take Stunning Photographs of Jewelry
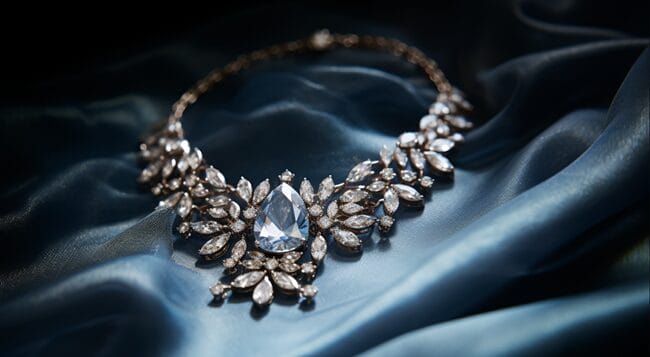
To take stunning photographs of jewelry, there are several key points to consider.
First, understanding how to properly light your jewelry is crucial for capturing its brilliance and sparkle.
Additionally, choosing the right background can enhance the overall aesthetic of your photos and make the jewelry stand out.
Utilizing props can also add visual interest and context to your images.
Lastly, employing post-production techniques can help enhance the details and colors of your jewelry photos.
Photography Lighting Tips for Jewelry
Capture the brilliance of your jewelry by experimenting with different lighting techniques. Proper lighting is essential for capturing the sparkle, shine, and intricate details of your jewelry.
When photographing jewelry, it’s important to use diffused light to minimize harsh shadows and reflections. Softboxes or light tents can help achieve this by evenly dispersing light and providing a smooth, even illumination.
Position your jewelry at a slight angle to the light source to create depth and highlight its unique features.
Consider using a reflector or bounce card to fill in any areas of shadow and enhance the overall brightness. Experiment with different lighting setups to find the one that best showcases your jewelry’s beauty.
By mastering lighting techniques, you can elevate your jewelry photography to a whole new level.
We are now prepared to proceed with the next phase of determining which backdrop is the best option to utilize during your jewelry photoshoot.
Choosing the Right Background for Jewelry Photography
When photographing jewelry, consider using a white background to make your pieces stand out and easily edit the photos.
A white background provides a clean and minimalist look, allowing the focus to be on the jewelry itself.
Here are some tips for choosing the right background for your jewelry photography:
- Opt for a seamless background made of pliable materials like paper or craft foam. This creates a smooth surface without any distracting lines or creases.
- Experiment with different background options such as black, reflective, or gradient backgrounds to add drama, interest, or depth to your photographs.
- Keep in mind that themed backgrounds can be fun, but they shouldn’t overpower the jewelry. Busy backgrounds or props may distract from the main subject.
- Consider the lighting conditions when selecting a background. Different backgrounds may require different lighting setups to achieve the desired effect.
By choosing the right background, you can create stunning photographs that showcase your jewelry in the best possible way.
Tips for Using Props in Jewelry Photography
While incorporating props into your jewelry photography, remember to choose items that complement and enhance the beauty of the jewelry. Props can add visual interest and context to your photographs, making them more engaging for viewers.
When selecting props, consider the style, color, and size of the jewelry piece. For example, if you’re photographing a delicate necklace, you may want to use a lace or silk fabric as a prop to create a soft and elegant look.
Related: The Best Photo Necklaces
Alternatively, if you’re photographing a bold statement ring, you could use a textured background or a piece of natural stone as a prop to add a touch of contrast and drama.
Try out various props to discover the ones that accentuate the one-of-a-kind characteristics of your jewelry collection.
Post-Production Techniques for Enhancing Jewelry Photos
To enhance your jewelry photos, use editing techniques such as adjusting brightness and contrast, sharpening details, and removing imperfections.
These post-production techniques can significantly improve the overall quality and attractiveness of your images, making them stand out in a saturated market.
Here are two key ways to enhance your jewelry photos through post-production:
Adjusting brightness and contrast:
- Increase brightness to make the jewelry appear more vibrant and eye-catching.
- Adjust contrast to enhance the definition and depth of the jewelry, making it look more three-dimensional.
Sharpening details:
- Use sharpening tools to bring out the intricate details of the jewelry, such as gemstones and engravings.
- Be careful not to over-sharpen, as it can create unwanted artifacts and make the image look unnatural.
Taking Professional-Grade Jewelry Photos with a Smartphone
With advancements in smartphone camera technology, you can now achieve high-quality jewelry photos without the need for expensive equipment.
Start by utilizing the macro setting on your phone camera to capture close-up shots of your jewelry. This setting allows you to focus on intricate details and showcase the beauty of your pieces.
Additionally, adjust the exposure, brightness, and contrast settings to enhance the appearance of the jewelry.
Consider investing in clip-on macro lenses for even better results. These lenses attach to your smartphone and provide enhanced magnification and clarity.
Don’t forget to use a tripod and set a timer to avoid camera shake.
Understanding the Importance of Lighting and Setup in Jewelry Photography
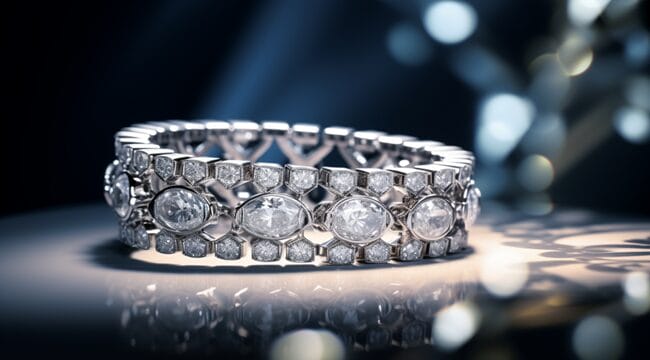
To achieve stunning photographs of jewelry, it’s essential to understand the importance of lighting and setup.
Proper lighting can make or break your jewelry photographs, as it highlights intricate details and enhances the sparkle and shine.
Different lighting setups, such as using diffusers or reflectors, can create the perfect lighting conditions for capturing the beauty of jewelry.
Additionally, techniques like capturing reflections and utilizing a light cone can add impact and depth to your jewelry photos.
How to Set up Lighting for Jewelry Photography
Place a ring light directly above the jewelry to create a stunning sparkle and highlight its intricate details.
This lighting setup is ideal for capturing the brilliance and beauty of jewelry.
To further enhance the overall look of your photographs, consider the following tips:
- Use a diffuser to soften the light and prevent harsh shadows.
- Position a reflector opposite the ring light to bounce light back onto the jewelry and minimize any unwanted shadows.
- Experiment with different reflector materials, such as white foam boards or silver reflectors, to achieve the desired effect.
- Adjust the angle of the reflector to control the intensity and direction of the reflected light.
Using Different Lighting Setups for Photographing Jewelry
When photographing jewelry, you can achieve different lighting effects by using a combination of setups and adjusting the angles of the lights.
One popular setup is the double overhead lighting setup, which involves using two lights positioned above the jewelry at a 45-degree angle. This setup helps minimize reflections and creates a soft, even lighting effect on the jewelry.
Another option is the 45-degree setup that utilizes V-flat. This setup involves placing a V-shaped white or black foam board on either side of the jewelry at a 45-degree angle to create a shadowless effect.
The exploration of various lighting setups may help you capture each dazzling gemstone or piece of jewelry with unique details and shine.
Tips for Creating the Perfect Lighting Conditions for Jewelry Photography
You can achieve the perfect lighting conditions for jewelry photography by understanding the importance of lighting and setting up the right equipment.
Here are some tips to help you create the best lighting conditions for your jewelry photography:
- Use soft lighting techniques: Soft lighting is ideal for capturing gemstone colors and controlling reflections. It helps to create a uniform glow and enhances the features of the jewelry.
- Experiment with different lighting setups: Try backlighting and side lighting techniques to highlight the edges, form, and intricate details of the jewelry. Natural lighting can also be a great choice as it enhances contrast and exposure.
If you understand the importance of lighting, and follow these tips, you, too, can probably create fantastic jewelry photographs.
Let us now proceed to the next juncture and gain knowledge of capturing reflection in jewelry photography.
Capturing Reflections in Jewelry Photography
Positioning the reflector correctly is essential for capturing reflections in jewelry photography. The reflector acts as a tool to bounce light onto the jewelry, enhancing its details and shine while minimizing unwanted reflections.
To achieve the desired effect, position the reflector opposite the light source, redirecting the light onto the jewelry.
Experiment with different reflector sizes and materials to find the one that works best for your specific jewelry.
Adjust the angle and distance of the reflector to control the intensity of the reflected light.
It is important to note that a reflector shouldn’t be the only source of light. It should be used in conjunction with other lighting techniques, such as diffusers, to create a balanced and flattering lighting setup.
Utilizing a Light Cone for Impactful Jewelry Photos
To achieve impactful jewelry photos, enhance the lighting and setup by utilizing a light cone with diffused light and strategic positioning.
Here’s how you can make the most of this technique:
Constructing the Light Cone Tent:
- Gather the necessary materials, including white translucent paper, scissors, clear tape, and blue painter's tape.
- Create the light cone tent, which involves setting up a test image, measuring dimensions, constructing the tent, and cutting out a lens opening.
Tips for Lighting the Cone:
- Use diffused light to minimize harsh shadows and reflections.
- Position your lights strategically to create subtle differences in lighting and highlight the jewelry’s best features.
Key Aspects of Post-Production and Retouching in Jewelry Photography
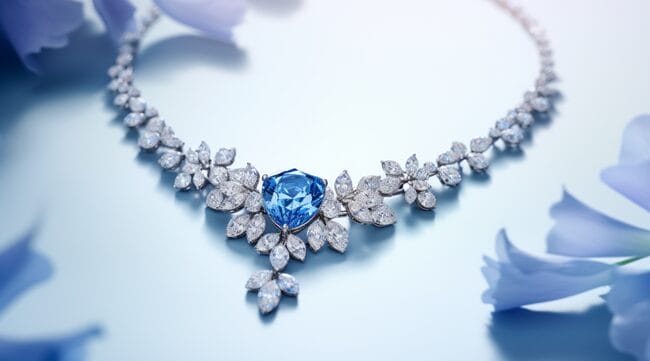
When it comes to post-production and retouching in jewelry photography, using Photoshop is essential.
With this software, you can easily retouch imperfections, adjust colors, and enhance the overall appearance of the jewelry images.
Additionally, post-production techniques such as sharpening, adjusting contrast and brightness, and removing unwanted reflections or shadows can greatly enhance the quality and appeal of the photos.
Using Photoshop for Retouching Jewelry Photos
You can use Photoshop to retouch your jewelry photos, improving their overall quality and appearance.
Here are some key aspects of post-production and retouching in jewelry photography using Photoshop:
Spot Healing Brush:
- Fix small blemishes in product photography by analyzing and replacing pixels.
- Adjust the brush size to match the blemish size.
- Ideal for removing dust and scratches from jewelry products.
Duplicating Earrings for Consistency:
- Duplicate one earring to create a matching pair.
- Ensure consistency in product images.
- Use the rectangular marquee selector tool to select and duplicate the earring.
These techniques are essential for enhancing the overall appearance and quality of your jewelry photos.
These quintessential techniques for livening up your shots are guaranteed to add some depth to your jewelry pictures and will make them appear that much more stunning.
Enhancing Jewelry Images with Post-Production Techniques
Enhancing the beauty of your jewelry images through post-production techniques is crucial for captivating your audience and increasing sales.
Post-production allows you to refine and perfect your jewelry photos, ensuring that every detail is showcased in the best possible way.
One key aspect of post-production in jewelry photography is color correction. This involves adjusting the color balance, saturation, and brightness to accurately represent the true colors of the jewelry.
Furthermore, retouching is essential for removing any imperfections, such as blemishes or dust particles, to create a flawless look.
The use of sharpening techniques can also enhance the clarity and detail of your jewelry images.
Furthermore, adding subtle shadows or reflections can create depth and dimension, making your jewelry appear more realistic.
These post-production techniques will elevate your jewelry images, making them visually stunning and highly appealing to potential customers.
Applying post-production techniques such as this will enhance your images to astonishingly high levels.
Anything that looks good within the jewelry market sells, people will easily be attracted to your images and that should be your number one goal.
Optimizing Jewelry Photographs for Use in Marketing Materials
To effectively optimize your jewelry photographs for use in marketing materials, consider using various post-production techniques and retouching methods.
These techniques can help enhance the visual appeal of your jewelry, making it more attractive to your target audience.
Here are two key aspects to focus on during post-production and retouching:
- Color Correction and Enhancement:
- Adjust the color balance and saturation to ensure an accurate representation of your jewelry.
- Enhance the vibrancy and richness of gemstones and metals to make them visually appealing.
- Background Removal and Composition:
- Remove distracting elements from the background to create a clean and focused image.
- Compose the jewelry in a visually pleasing way, taking into consideration the rule of thirds and balance.
Related: Review of PixCut
Retouching Jewelry Photos for an Appealing Look
When retouching jewelry photos, focus on enhancing the details and clarity of gemstones and metals, as well as tidying up bad reflections and achieving appropriate color correction.
To enhance the details and clarity of gemstones and metals, use tools like the Sharpen tool or the High Pass filter in Photoshop. Adjust the sliders to increase the sharpness without overdoing it.
To tidy up bad reflections, use the Clone Stamp tool or the Healing Brush tool in Photoshop. Clone out any distracting reflections and replace them with a clean area from the image.
To achieve appropriate color correction, use the Curves adjustment layer in Photoshop. Adjust the RGB channels to correct any color casts and make the jewelry look more vibrant and appealing.
Remember to work non-destructively by using adjustment layers and masks.
Tips for Capturing Different Types of Jewelry
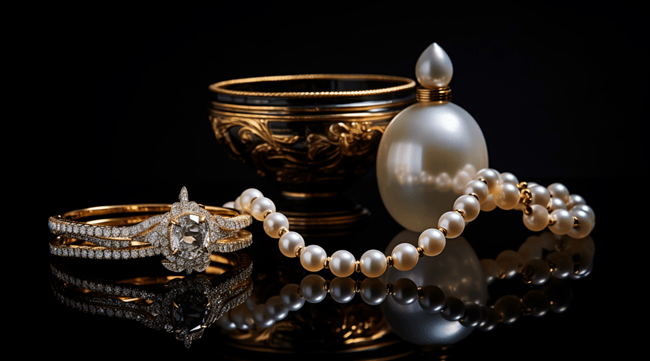
When photographing necklaces and pendants, it’s important to consider the length and composition of the piece.
To improve ring photography techniques, try using a macro lens to capture intricate details and focus on the gemstone or design.
When shooting bracelets and bangles, ensure proper lighting and positioning to showcase their shape and texture.
To capture the sparkle in gemstone jewelry, experiment with different lighting angles and reflections.
When photographing earrings and studs, use a soft background and focus on the intricate details of the piece.
Photographing Necklaces and Pendants
Capture the unique beauty of your necklaces and pendants by following these tips for photographing different types of jewelry:
- Use a necklace stand or a model: Display your necklace on a stand or use a model to showcase how it looks when worn. This helps to give a sense of scale and allows potential buyers to visualize the jewelry on themselves.
- Experiment with angles: Try shooting your necklace from different angles to find the most flattering perspective. Capture close-ups of intricate details and long shots to show the entire piece in context.
- Highlight the pendant: If your necklace has a pendant, make sure to focus on it. Use a shallow depth of field to blur the background and draw attention to the pendant’s design and gemstones.
- Play with lighting: Experiment with different lighting setups to enhance the sparkle and shine of your necklace. Use natural light or softboxes to create a soft, diffused glow, or try backlighting the necklace for a dramatic effect.
Remember to leave ample space between the jewelry and the background and use proper lighting techniques to capture the true beauty of your necklaces and pendants.
Improving Ring Photography Techniques
With various types of jewelry, how can you take great pictures? One way is to try to use different lighting effects.
When photographing rings, it’s important to highlight their unique details and enhance their overall appearance.
One technique to consider is using a video light. This portable light source provides consistent lighting and can be positioned to create soft and flattering light on the rings.
Another lighting technique to try is playing with natural light. Natural light can create a soft and romantic atmosphere, perfect for capturing the beauty of rings.
Additionally, using artificial lighting can add drama and help highlight the intricate details of the rings.
Essential Photography Tips for Bracelet and Bangle Shots
For capturing stunning photos of bracelets and bangles, you should pay attention to the lighting and background to enhance their beauty.
Here are some essential photography tips to help you capture the perfect shot:
Lighting:
- Use soft, diffused lighting to minimize harsh shadows and reflections.
- Consider using a lightbox or diffuser to create a controlled lighting environment.
Background:
- Opt for a simple, clean background that won’t distract from the jewelry.
- Use a neutral color or a complementary color to make the jewelry stand out.
By following these tips, you can ensure that your bracelet and bangle photos showcase their intricate details and shine.
Experiment with different lighting setups and backgrounds to find the perfect combination that highlights the unique features of each piece.
Remember, practice makes perfect, so don’t be afraid to try different techniques and refine your skills over time.
Capturing the Sparkle in Gemstone Jewelry
Enhance the sparkle of your gemstone jewelry by experimenting with different lighting techniques and angles.
Gemstones, with their vibrant colors and reflective surfaces, require special attention to capture their brilliance in photographs.
To showcase the sparkle, start by using natural light outdoors. The soft, diffused light brings out the gemstone’s natural brilliance without creating harsh reflections.
Indoors, try using a combination of soft and harsh lights to create a balanced effect. Soft lights minimize reflections, while harsh lights add depth and dimension.
Consider using an external flash or bare bulb for better results. However, be cautious of color distortion caused by harsh light sources.
To avoid this, turn off any other harsh light sources in the room.
Taking Professional Shots of Earrings and Studs
Capture the intricate details of your earrings and studs by experimenting with different angles and lighting techniques.
To ensure professional shots, follow these tips:
Angle and Lighting Techniques:
- Capture the front and back sides: Experiment with angles to showcase the entire earring, especially for long or dangling earrings.
- Highlight back details: Take shots from different angles to highlight textures and intricate designs.
Composition and Props:
- Keep the focus on earrings: Avoid grouping different pairs in one photo to prevent confusion.
- Use simple and non-distracting props to maintain focus on the earrings.
- Use display boards: Suspend earrings for better focus and aesthetics by using display boards or props like paper or clear thread.
Utilizing Tools and Techniques for Jewelry Photography
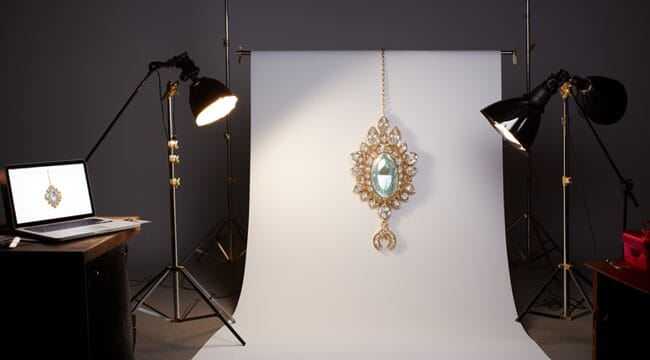
To capture sharp and detailed images of jewelry, it’s essential to use a tripod for stability. By eliminating camera shake, you can ensure that each piece is showcased in its best light.
Additionally, selecting the right lens for jewelry product photography is crucial. A macro lens with a high magnification ratio will allow you to capture intricate details and textures with precision.
Reflectors are another handy tool in jewelry photography. They can be used to bounce light and fill in shadows, enhancing the overall appearance of the piece.
Understanding the impact of depth of field is also important. By adjusting the aperture, you can control how much of the piece is in focus, creating a desired visual effect.
Lastly, a light tent can be highly beneficial in jewelry photography. Its diffused lighting helps to eliminate harsh shadows and highlights, resulting in even illumination and accurate color representation.
Using a Tripod for Stable Jewelry Photography
To achieve stable jewelry photography, you’ll need to use your tripod effectively.
Here are some tips to help you make the most of your tripod:
- Ensure stability: Make sure your tripod is set up on a solid surface and adjust the legs to the desired height. This will prevent any unwanted movement or camera shake.
- Use a remote shutter release: A remote shutter release eliminates the need to physically touch the camera, reducing the risk of camera shake. Alternatively, you can use the camera’s self-timer function.
With your jewelry securely mounted on a stand, a tripod will provide the stability you need to capture sharp, detailed images.
Related: The Best Gimbals for DSLR Cameras
Choosing the Right Lens for Jewelry Product Photography
When photographing jewelry, you should consider the right lens to enhance the details and capture the beauty of the pieces. The choice of lens can greatly impact the overall quality of your jewelry product photography.
To capture intricate details, a macro lens is recommended. A macro lens allows for close-up shots with excellent sharpness and clarity, enabling you to showcase the fine details of jewelry pieces such as gemstones, engravings, and textures.
Additionally, using a lens with a wide aperture, such as a prime lens with a low f-stop value, can help create a shallow depth of field, resulting in a beautiful blurred background that draws attention to the jewelry itself.
It is important to experiment with different lenses and focal lengths to find the one that best suits your specific jewelry photography needs.
Effectively Using Reflectors in Jewelry Photography
If you want to achieve optimal lighting in your jewelry photography, try using reflectors to effectively balance out shadows and provide even illumination to your jewelry pieces.
Reflectors can be a valuable tool in enhancing the overall quality of your jewelry images.
Here are two key techniques to effectively use reflectors in your jewelry photography:
- Positioning the reflector: Place the reflector on the opposite side of the light source to fill in the shadows. By angling the reflector correctly, you can bounce light onto the jewelry piece, reducing harsh shadows and creating a more balanced lighting setup.
- Choosing the right reflector material: Reflectors come in different materials, such as silver, gold, white, and translucent. Experiment with different options to find the best one for your specific jewelry piece.
Silver reflectors provide a strong and direct reflection, while gold reflectors add warmth and richness to the image.
White reflectors offer a more neutral and diffused reflection, and translucent reflectors soften the light for a more delicate look.
Understanding the Impact of Depth of Field in Jewelry Photography
Use a wide aperture setting to achieve a shallow depth of field and create a beautiful bokeh effect in your jewelry photography.
Depth of field plays a crucial role in capturing the intricate details of jewelry. With a shallow depth of field, you can isolate the main subject and blur the background, drawing attention to the jewelry itself.
To achieve this, set your camera to a low f-stop value, such as f/2.8 or f/4. This will result in a smaller depth of field, allowing you to focus on specific areas of the jewelry.
Keep in mind that the closer you’re to the subject, the shallower the depth of field will be.
By having a thorough comprehension of what depth of field is and how it works, this knowledge will allow you to make sure your jewelry pictures are tack-sharp and depict the precise detail of each section of the jewelry you are shooting.
Now, let’s explore how you can maximize the benefits of a light tent in jewelry photography.
Maximizing the Benefits of a Light Tent in Jewelry Photography
To achieve professional-looking jewelry photographs, you can enhance your setup by utilizing a light tent and employing various tools and techniques.
A light tent is a portable and affordable solution that helps to diffuse light and eliminate harsh shadows, resulting in even lighting and a clean background.
Here are two key ways to maximize the benefits of a light tent in jewelry photography:
- Use proper lighting: Place your light sources outside the light tent and direct the light towards the tent to achieve a soft and diffused lighting effect. Experiment with different angles and positions to find the best lighting setup for your jewelry.
- Utilize accessories: Consider using reflective surfaces, such as white foam boards or mirrors, to bounce light back onto the jewelry and add sparkle. You can also use black cards to block unwanted reflections and create more contrast.
Conclusion
So there you have it, a comprehensive guide on how to photograph jewelry like a pro.
By understanding the importance of lighting and setup, mastering post-production and retouching techniques, and utilizing the right tools and techniques, you can capture stunning images of any type of jewelry.
So why wait? Grab your camera, set up your lighting, and start snapping away.
Who knows, you might just become the next renowned jewelry photographer!
FAQs
1. How can I ensure the best lighting setup for jewelry photography?
When capturing photographs of your stunning jewelry pieces, it's essential to have a well-planned lighting setup. Experiment with different light sources and consider using artificial light to eliminate unwanted shadows and reflections.
2. What are some top tips for achieving a captivating background in jewelry photography?
The background in jewelry photography plays a crucial role in the overall composition of your photos. Opt for a plain white backdrop to ensure that your jewelry pieces remain the focal point without any distractions.
3. How can I minimize reflections and ensure a professional finish in my jewelry photographs?
To avoid unwanted reflections, it's important to position your jewelry and lights strategically. Consider using a light tent or reflector to control reflection and achieve a polished final image.
4. What camera settings and equipment should I use for jewelry photography?
Set your camera to a low aperture to create a captivating depth of field and focus on the intricate details of your jewelry. Additionally, using a tripod can help eliminate camera shake for sharp and precise images.
5. Is post-production editing necessary for jewelry photos?
While capturing the perfect shot is essential, post-production editing can further enhance the beauty of your jewelry. Tools like Photoshop allow you to retouch and align your images, ensuring each piece looks its best.
6. How can I make my jewelry pieces sparkle in photographs?
To truly capture the dazzle of your jewelry, consider adjusting the light cone and experimenting with different light sources. This will help enhance the sparkle and brilliance of your jewelry pieces.
